|
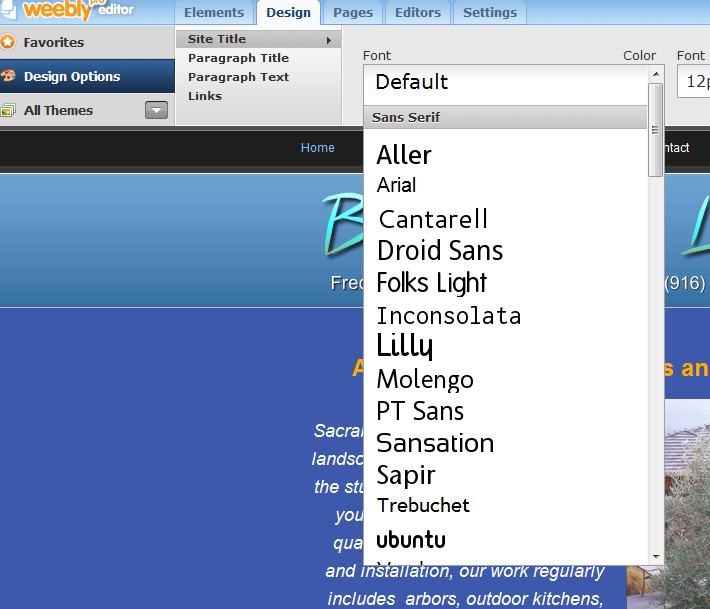
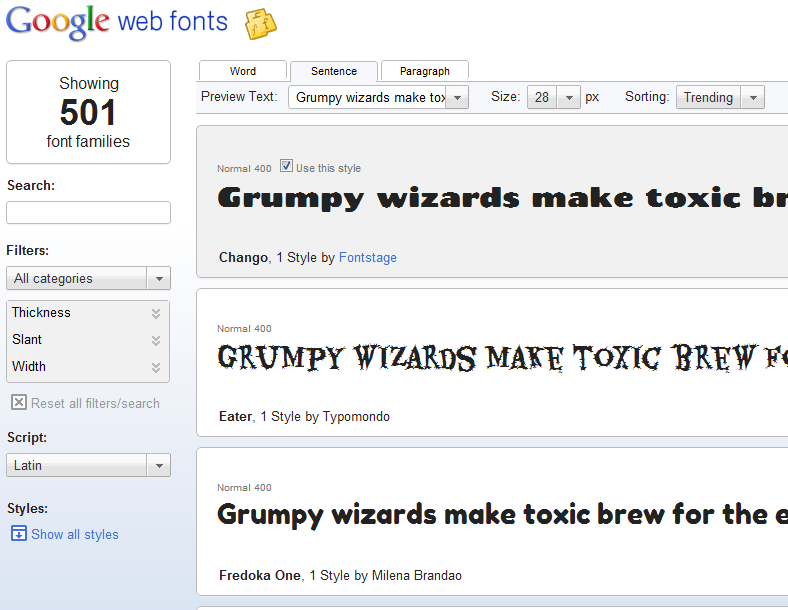
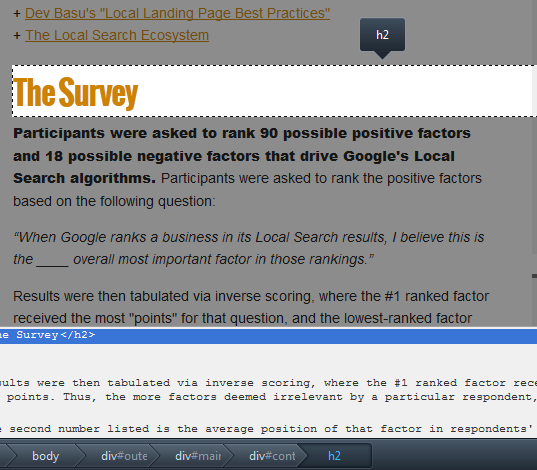
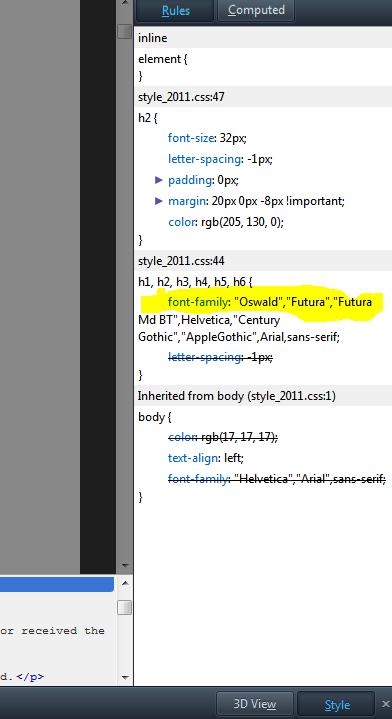
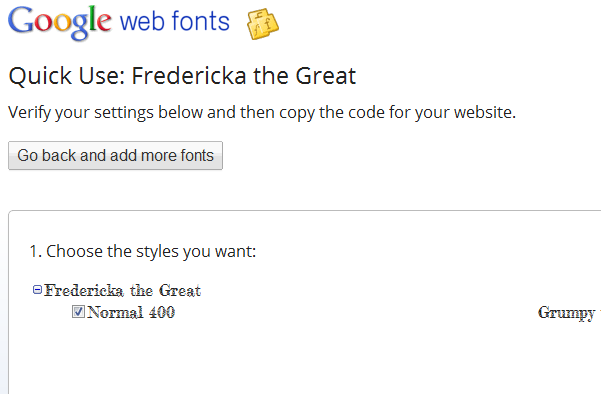
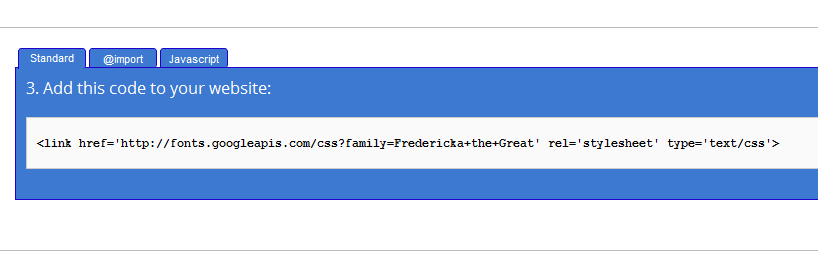
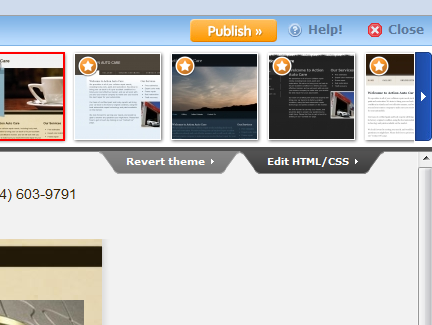
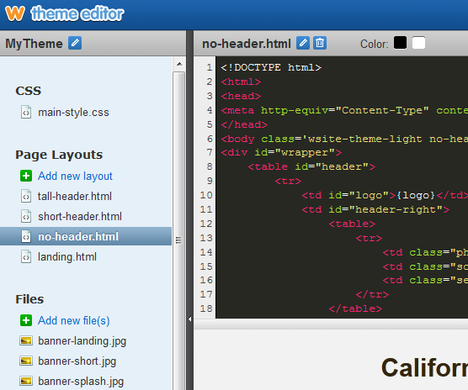
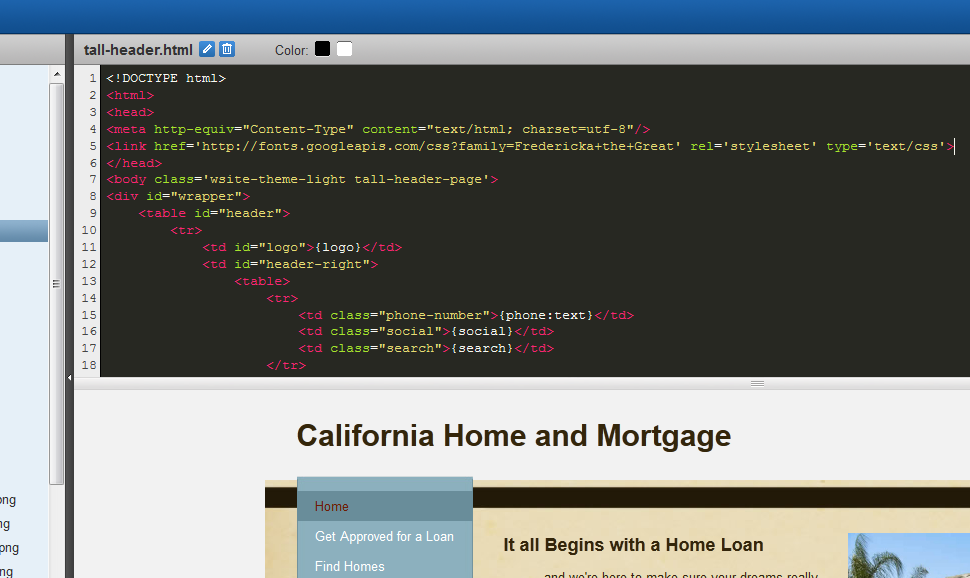
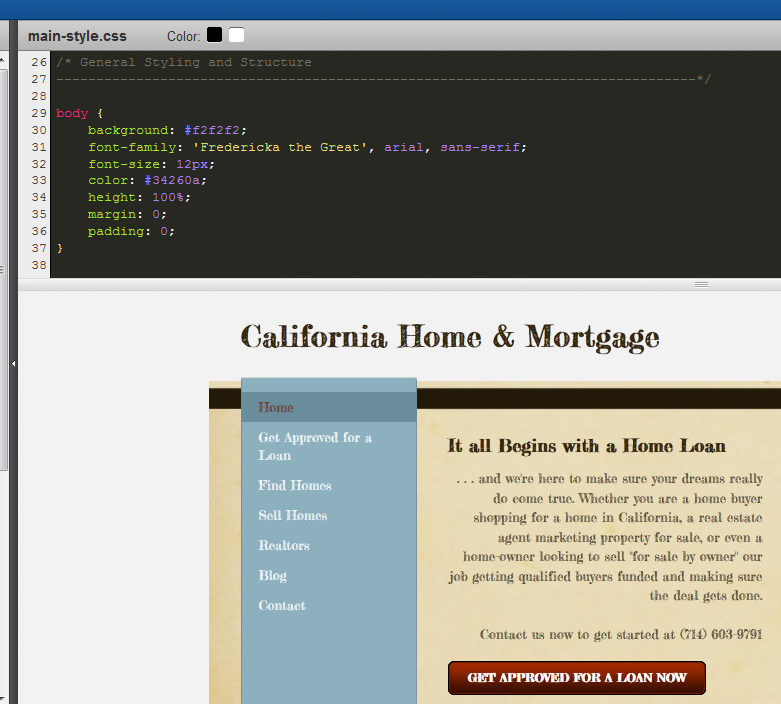
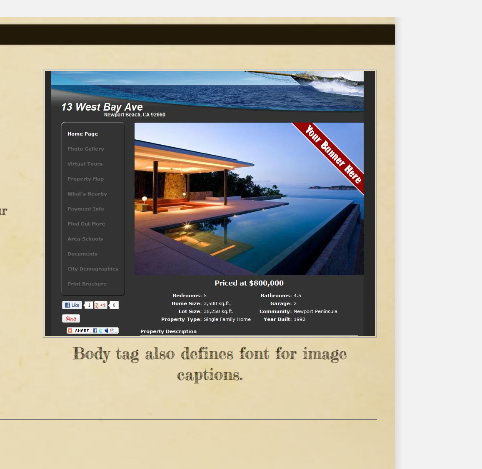
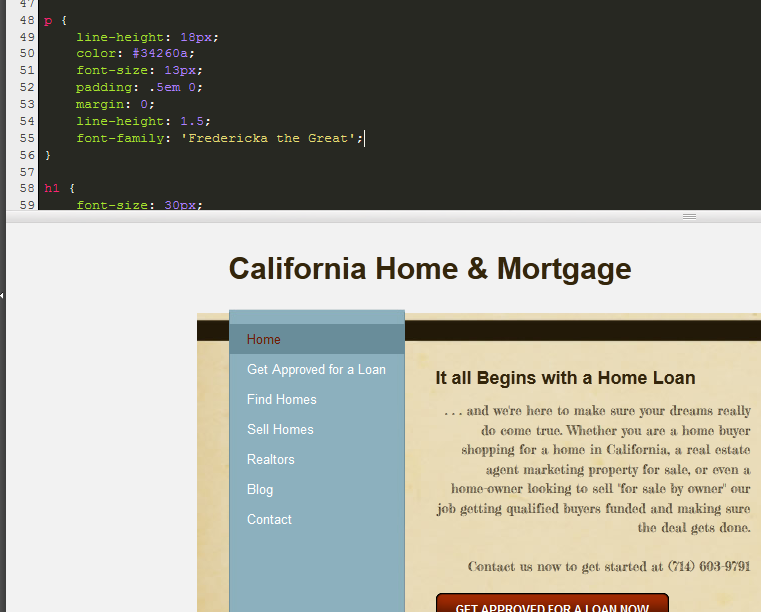
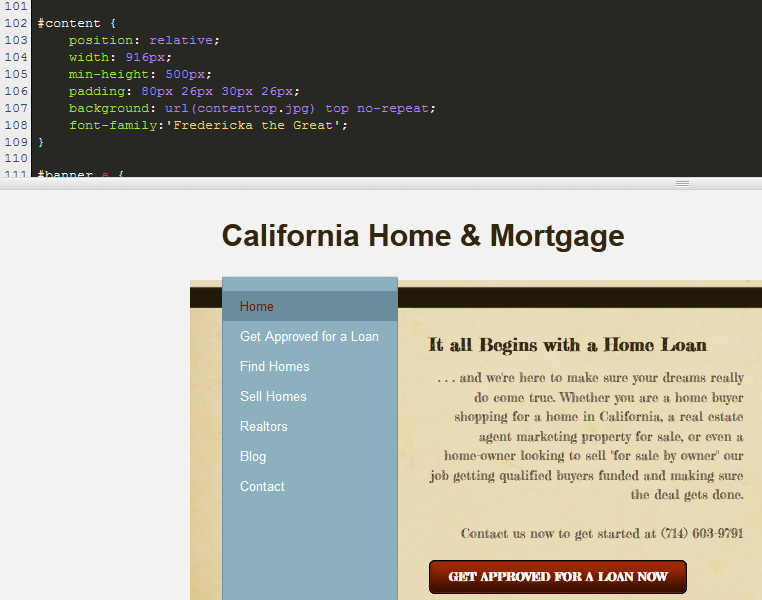
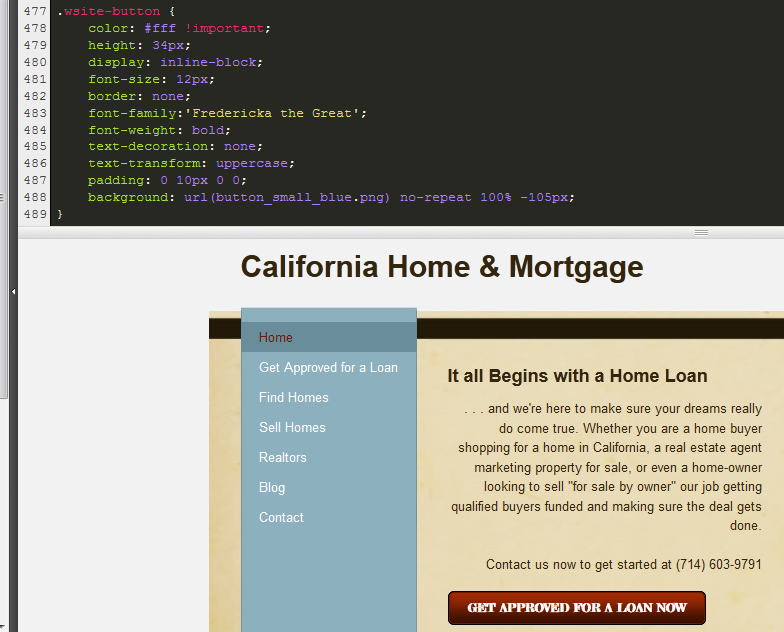
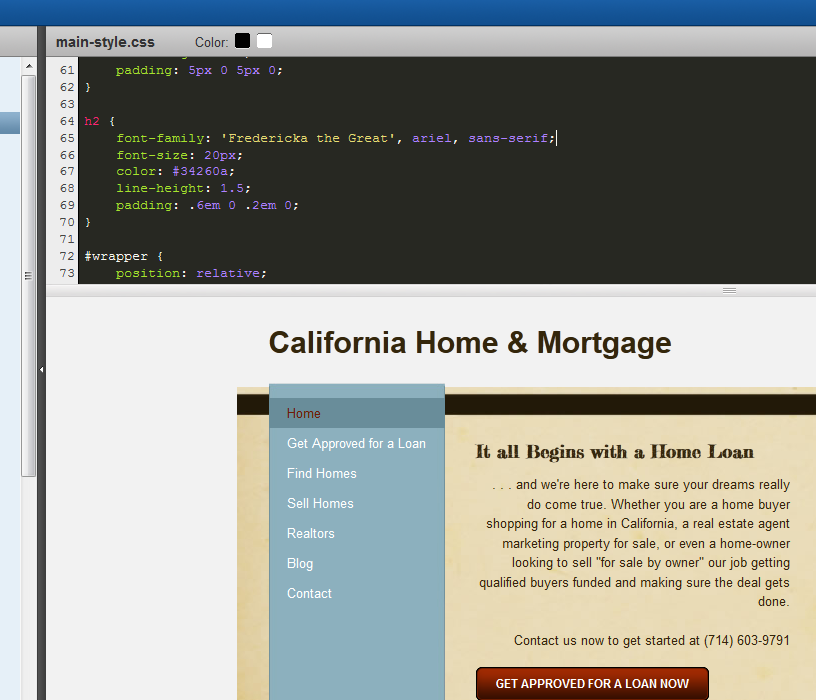
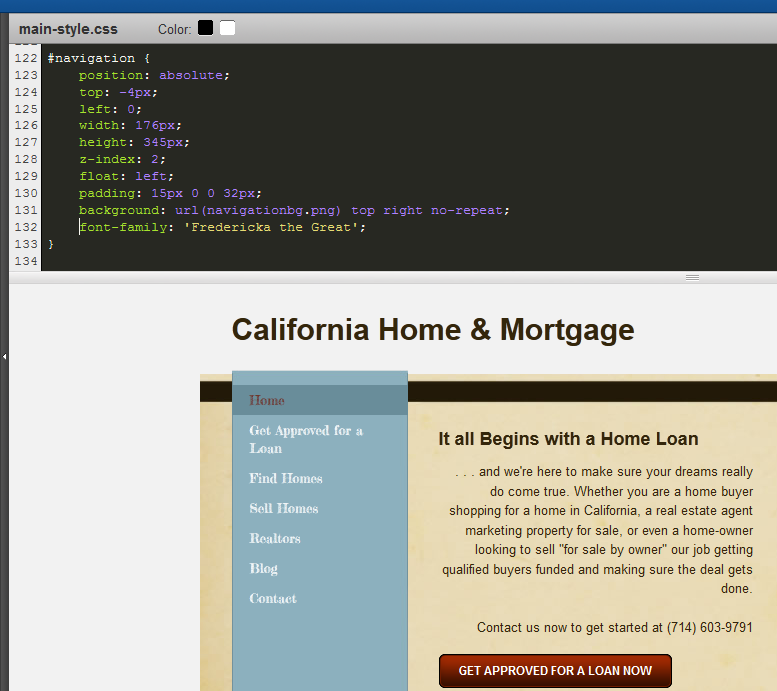
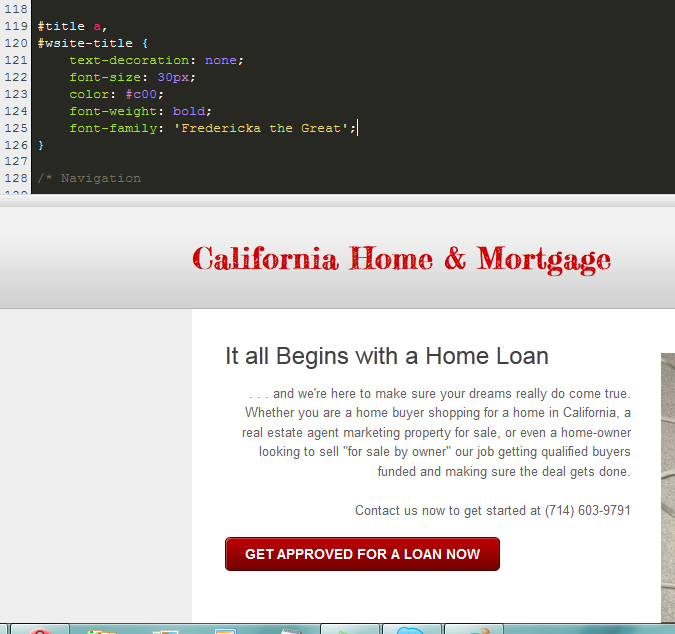
The Weebly CMS offers a wide variety of built in web fonts easily available for use in the main elements of your Weebly website. This article will assume that you know how to use them to change the font style on your Weebly Site Title, Paragraph Titles, and Paragraph Text. If not, it's easy to do. Simply click on the Design tab in your Weebly editor, then choose Design Options and make your different selections. But what if you run into a situation where the fairly wide variety of fonts offered by Weebly just aren't right for your website design? Or perhaps you've seen a great font on another website and want to use it but Weebly doesn't offer it? Further still, what if you're building a website that just a needs a specific font that Weebly's system doesn't have available? This tutorial will show you how to add new fonts to Weebly using Google web fonts. There are basically three broad steps to the process of adding a Google web font to your Weebly website. Step 1. Find Your Font. Step 2. Add the Link to your Page Type HTML Step 3. Define the Font-Family in your Main-Style CSS So let's try and walk through the process in more detail. Step 1. Find Your New FontIf you know the name of your font already, great! You can usually just type it into Google and if it's part of the Google web fonts collection it will display as one of the top search results. Or you can obviously go to the site itself and search. If you don't know the name of your font, or don't have one in mind you can also just browse using different parameters (thickness, width, slant, etc.) As a somewhat tangential mini-tutorial, another option refers to that situation where you have seen a great font on another website and would like to use it on your own but don't know what it is called. If you are a little more web saavy you can look for font names on other websites by right-clicking on it and selecting "View Source" in Internet Explorer (IE), or "Inspect Element" in Firefox, Google Chrome or Opera. I prefer to use the most recent versions of Firefox for this because it offers the best html inspection interface. For the pupose of this tutorial, however, we simply went to Google web fonts and picked an interesting font named "Fredericka the Great." Step 2. Add the Link to your HTMLOnce you've found your font you can either add it to a collection or click "Quick Use." Per the instructions at Google web fonts, copy the link offered for the font. In the Weebly editor click on the Design tab and then click on Edit HTML/CSS. Under Page Layouts click on the page type you are using. In this example we are using the no-header.html page type. Paste the Google web font link somewhere below the opening <head> tag and above the closing </head> tag. Click Save. Congratulation, now your new font is linked to your website and available for use! But wait, you wont see it anywhere just yet. In order for that to happen you must define where it is to be displayed in you main style CSS. Step 3. Define the New Font in your Main-Style CSS Once again click on the Design tab and then EDIT HTML/CSS. This time, instead of page type, click on your main-style css. Here is where you are going to define where you want your new font to display and there are lots of possibilities. Weebly themes vary in how page types and CSS are set up and defined but there are many consistencies across themes. So once you get the hang of it you should be able to find your way around any theme, even if you have to do some experimentation. The command line you will want to add or change follows this format: font-family: 'Fredericka the Great', ariel, sans serif; 'Fredericka the Great' is the font we are using in our example (so please change yours accordingly :-). The second two font choices - ariel, sans serif - are a standard precaution when defining fonts for the web. If for some reason a browser does not support the 'Fredericka the Great' font, it will have a couple of other choices to fall back on and display instead. In our example theme, this is what happens if you add the font to the body tag. Note in the image below how our font now displays in Site Title, Paragraph Title and Paragraph Text as well as in the Navigation and Button elements - or simply everywhere. This is because in this particular Weebly theme, body is the only section in which a specific font-family is defined. Thus each element will take its command from the body definitions by default. Changing the font in the body section CSS is also how you change the font for Weebly image captions, as in the below example. To change the font in the Paragraph Text only, try looking for the p { in your main-style CSS. Add the font-family definition. Here we just added the new font in the last line of code, before the closing }. Behold, our Paragraph Text alone is now "Fredericka the Great." All of the rest of the elements continue to inherit their font definition from the body tag. In other themes this same result may be achieved by adding the font-family definition to the #content CSS. This depends, however, on whether or not the other elements are defined with a font style or not. The image below shows what happens if we do that in our example theme - the font displays in both the paragraph and title and button because the title and button elements CSS have not otherwise been defined differently. (Site title and navigation continue to inherit font from the body tag because those elements are differentiated from content in the page layout's HTML set up.) To change the font for the Button element only, look for .wsite-button in the CSS and add the font-family definition. But what about Paragraph Title alone? This is probably one of the most frequent places you would like to have a nifty new font. Across all Weebly themes, the Paragraph Title is h2 (html for "heading 2"). So to change the font for your Paragraph Titles only, add the font definition to the h2 section of the CSS. Another general consistency across Weebly themes is CSS Navigation definition. Our example theme does not define a font-family for navigation - so by default it inherits that definition from the body CSS (e.g. example above). But generally speaking, if there is no font-family definition to a page element, you can change it simply by adding one (e.g. the rest of our examples). So, to change only the Navigation in our theme we simply add our font to the #navigation CSS. Here again, we've simply added it as the last line of code before the closing }. Weebly Site Titles have become more involved of late and the parameters and definitions can vary across themes. In our example theme, the only option for using our font for site title alone seems to be to add it to the body section (e.g. example above) and the proceed to give each of the other elements a different definition. This isn't always the case, however. Across all Weebly themes Site Tiltle is "h1." Thus often by following our instructions for paragraph title/h2 above, you can get the same result for your Weebly Site Title. Another possibility is when the Weebly theme has Site Title specifically defined in html/css already. In this theme example we found "#wsite-title" in the CSS and again simply added our font-family definition to the CSS. So now we suppose you are asking, can I add more than one new web font to my Weebly theme? The answer is yes, of course! To add numerous new and different fonts simply repeat the steps above to choose and add the link to your page type and then define where you want it to display in your main-stylee css. A few notes to keep in mind when adding Google Web Fonts or any other third party web fonts to your Weebly website.
And there you have it. Have fun adding new and different Google web fonts to your Weebly website!
12 Comments
|
Timothy J Melody
Archives
March 2015
Categories
All
|

 RSS Feed
